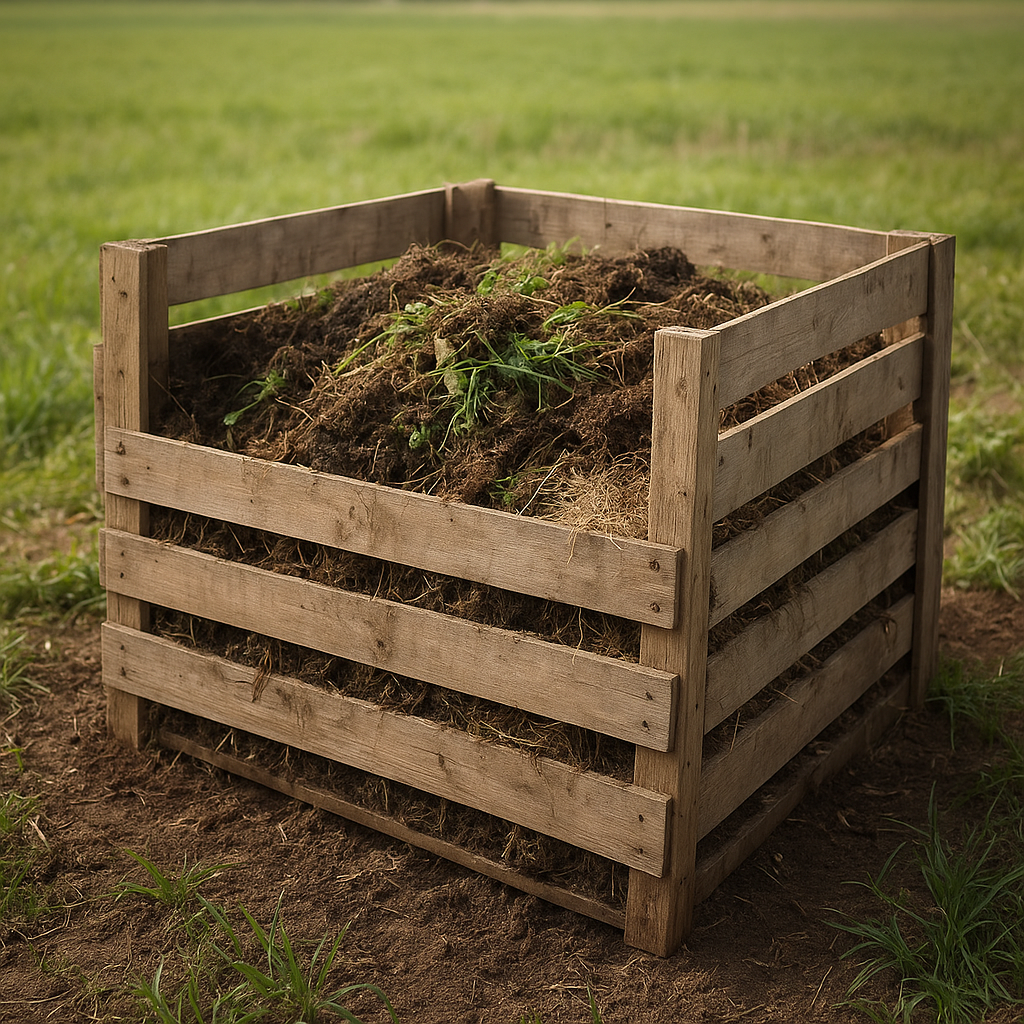
Building a reliable compost bin is a crucial step toward enhancing your farm’s overall productivity and promoting eco-friendly practices. By converting everyday farm residues into rich, nutrient-dense soil amendments, you can close waste loops, reduce reliance on chemical inputs, and foster healthier crops. In this guide, you will learn how to plan, construct, and maintain a durable compost bin that meets the specific needs of your agricultural operation.
Benefits of On-Farm Composting
Implementing an on-farm composting system delivers multiple advantages, from improved soil health to waste management. Incorporating compost into your fields supplies a slow-release source of essential nutrients, reducing the need for synthetic fertilizers. As organic materials break down, native microorganisms flourish, bolstering soil biology and helping plants resist diseases. Enhanced drainage and water-holding capacity create more resilient root environments, while increased aeration supports robust microbial activity.
- Reduced disposal costs and minimized environmental impact
- Enhanced plant growth through improved soil structure
- Greater retention of soil moisture during dry spells
- Lower dependence on external chemical inputs
- Support for long-term sustainability and ecological balance
By converting crop residues, animal manures, and other farm byproducts into valuable soil conditioner, you promote closed-loop farming that benefits both the land and the bottom line.
Materials and Tools Needed
Gathering the right supplies before you begin ensures a smooth build process. The following list outlines essential components for a sturdy compost bin:
- Pressure-treated lumber or recycled pallets for the frame
- Galvanized wire mesh or hardware cloth for side panels
- Sturdy hinges and latch for a secure lid
- Deck screws or galvanized nails
- A level and tape measure for accurate assembly
- A shovel and rake for material handling
- Screened blocks or bricks for elevating the bin (improved drainage)
- Drill/driver and saw for cutting and fastening
Choosing durable materials helps maintain the bin’s structure in varying weather conditions, ensuring a long-lasting composting solution.
Step-by-Step Construction Guide
1. Selecting and Preparing the Site
Pick a level, well-drained location that receives partial sunlight. Direct sunlight accelerates decomposition, but too much heat can dry out the pile. Clear vegetation and level the ground. Lay down a base of bricks or recycled blocks to promote airflow beneath the bin.
2. Building the Frame
Cut four vertical posts to your desired height (36–48 inches is typical). Attach horizontal boards at the top and bottom of each side, forming a rectangular or square frame. Ensure all corners are square by using a level and a carpenter’s square.
3. Attaching Side Panels
Fasten the galvanized wire mesh to the interior of the frame, leaving about 2 inches gap at the bottom for aeration. The openings in the mesh should allow sufficient airflow while retaining shredded organic matter.
4. Constructing the Removable Front Panel
Design one side of the bin with a hinged door for easy access when turning or harvesting finished compost. Use heavy-duty hinges and a latch that can withstand repeated opening and closing.
5. Adding the Lid
Create a simple slanted lid to keep excess rain out while allowing gases to escape. Use overlapping boards or a corrugated metal sheet. Attach the lid with hinges and a hook latch to secure it in windy conditions.
6. Final Touches
Sand any rough edges and apply weather-resistant sealant to the external wood surfaces. Label the bin with the start date for each new batch, helping you track progress and fertilization schedules.
Maintaining and Troubleshooting Your Bin
Ongoing care ensures high-quality compost and prevents common issues like foul odors or slow breakdown. Monitor these key factors:
- Moisture: The pile should be as damp as a wrung-out sponge. Add water during dry spells or cover with a tarp to retain moisture in heavy rain.
- Airflow: Turn the materials every 2–3 weeks to supply fresh oxygen to aerobic microorganisms. Lack of oxygen leads to anaerobic conditions and unpleasant smells.
- Balance of carbon- and nitrogen-rich ingredients. Aim for a roughly 30:1 carbon-to-nitrogen ratio for optimal decay.
- Pile size of at least 3 ft³ (ideally 4×4×4 feet) to maintain internal temperatures around 130–150°F, speeding decomposition.
Common problems and fixes:
- Odor: Increase aeration and reduce overly wet or compacted layers.
- Pests: Keep meat and dairy out of the pile, and secure lids to deter rodents.
- Slow breakdown: Chop materials finer, maintain temperature, and adjust moisture.
Regular monitoring and fine-tuning of conditions will yield dark, crumbly compost in as little as two to four months. Incorporate this material into planting rows or topdress beds to deliver a steady supply of rich nutrients and improve long-term soil vitality.
